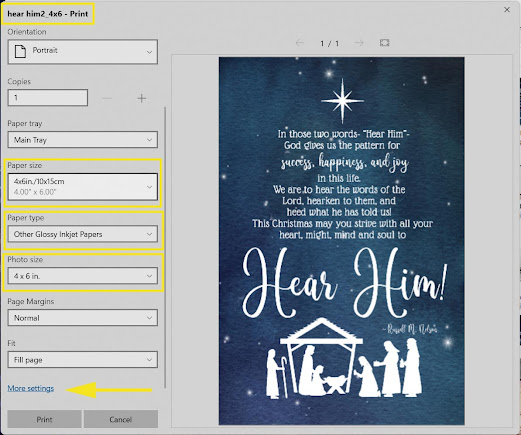
Having trouble printing a 4"x6" image on 4"x6" paper? Follow these steps to print a perfect postcard every time. Depending on what version of Windows you are running and the brand of your printer, these pictures might not look the same on your computer. But the steps are pretty universal. Just remember to open the correct 4"x6" sized file, choose the 4"x6" paper size, choose matte or glossy paper and borderless printing.
Steps:
1. Load your printer with 4"x6" paper and open the 4"x6" JPG image file.
2. Click "Print" from the drop down menu.
3. Select 4"x6" paper size from the "Paper size" drop down menu.
4. Select the type of paper you are using from the "Paper type" drop down menu. I recommend always printing on glossy or matte photo papers.
5. Select 4"x6" from the "Photo size" drop down menu.
6. Select "More settings" or "Advanced settings"


